Some organizations' IT administrators have strict policies on allowing their employees to connect 3rd party applications - this guide is for IT administrators who need instructions to authorize the Leadline Connected Calendar app from the Microsoft Azure Enterprise store.
Overview
In today’s recruiting environment, the best candidates are hired (or lost) based upon how quickly employers can qualify and schedule interviews with applicants. With hundreds or thousands of applications to work through, the process of scheduling interviews can quickly become repetitive and inefficient, resulting in lost candidates and general productivity waste.
The Leadline Connected Calendar app allows clients to connect their Office 365 (Outlook) calendar to the Leadline platform to streamline the interview scheduling process with candidates which your team is sourcing with Leadline, creating a better experience for both employers and jobseekers alike.
Setup instructions for Organizations using Microsoft Office 365
The Leadline Connected Calendar (Office 365) application is available in the Azure Enterprise Applications store and complies with Microsoft’s OpenID Connect and OAuth standards. Users authenticate via a standard 'sign-in with Microsoft' process, granting Leadline access to the following user-level permissions:
| API Scopes | Used for |
|
Calendars.Read Calendars.ReadShared |
Determining whether there is an opening/availability for the connected calendar (which Leadline presents to the jobseeker, so they can choose a suitable time that works for them and the recruiter). |
|
Calendars.ReadWrite Calendars.ReadWrite.Shared |
Creating a new Meeting Event for the specified or chosen availability (which includes description and Zoom/Teams meeting information). |
|
User.Read |
Retrieving the User’s profile information (name and email) for displaying the name and email address associated with the Connected Calendar. |
|
offline_access |
Retaining meeting information for booked meetings (in case of need for reschedule) |
How to Authorize the Connected Calendar app for your Organization
For IT administrators who restrict granting 3rd party app consent to IT administrators, you can either grant an organization-wide approval for the Leadline Connected Calendar (Office 365) application, or you can designate specific individuals based upon your business needs. We recommend granting organization-wide approval given the fact that hiring managers (who are often involved in the candidate interview process) can be across multiple groups or departments within the organization. To grant authorization;
-
Log-in to your Microsoft Azure account and navigate to Microsoft Entra ID:
-
In the left-hand navigation, select Enterprise applications and click the + New Application Button:
-
Search the gallery for “Leadline” and select Leadline Connected Calendar (Office 365) and click the Create button at the bottom of the selection view:
-
Once created, navigate back to your Enterprise applications and select Leadline Connected Calendar (Office 365) from the list:
-
In the left-hand navigation under the Security section, click on Permissions:
-
Click the Grant admin consent for and follow the Microsoft sign-on prompt to authorize Leadline for your entire organization. If you wish to grant access to a select set of individuals, use the Users and groups page.
Note: if you choose this method, you as IT administrator will be responsible for maintaining and managing the list of authorized employers within your organization.
Connecting your Calendar (User experience for Recruiters & Hiring Managers)
First, users that wish to allow Leadline to automate their interview scheduling process need to grant consent to Leadline by using the ‘sign in with Microsoft’ option from the Leadline Connected Calendar page.
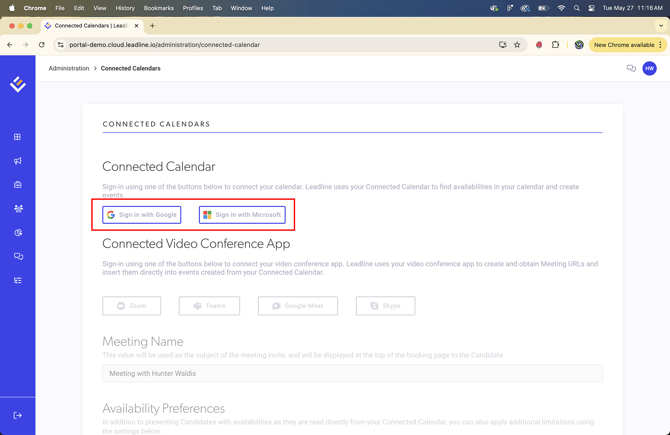
Once authorized, Leadline will display the connected calendar information (User.Read and email permissions).

How do I Schedule Meetings with Candidates?
Once your calendar is connected, recruiters can schedule meetings with candidates the following ways:
- Via the 'Schedule a Meeting' button via the candidate profile.
- Via an automated Email/SMS that is triggered within a workflow.
- Via an Email/SMS sent manually (CRM and Positions Page).
Scheduling a Meeting Via the Candidate Profile
First, Navigate to a candidates profile and click on the 'Schedule Meeting' button.Note: This button will be disabled if you do not have your calendar connected. Please go back and connect your calendar first before moving on.

After clicking the schedule meeting button, you can configure the meeting details and message you want to send to the candidate.

If 'Schedule Through Connected Calendar' is checked, the candidate will pick a time that is available on the calendar that you connected earlier. If unchecked, you can manually select the date and time to schedule the meeting with.
Note: When scheduling interviews with candidates, you must choose a specific position for the interview; meeting links sent to candidates are generated based on the positions the candidate has applied for.
The capability to schedule meetings with candidates, irrespective of their application status for a position, will be available soon!
Once you configured the message, click the 'Send Meeting Invite' button, and the candidate will receive the email with the proper meeting settings.
Scheduling a Meeting Via an Automation Within a Workflow
If you have a meeting as a part of a process for your open positions, you can trigger automated emails and SMS texts to be sent once candidates reach a specific stage in your process. To learn more about workflows and how to create them, please visit our workflows page.
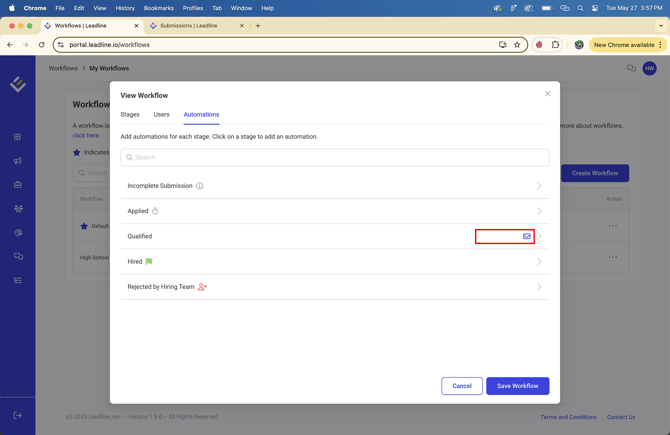
First you should decide which stage in the workflow you would like to send a candidate a meeting link inviting them to interview. After you have decided at which point in the workflow to interview them, navigate to the automations tab within the workflow.
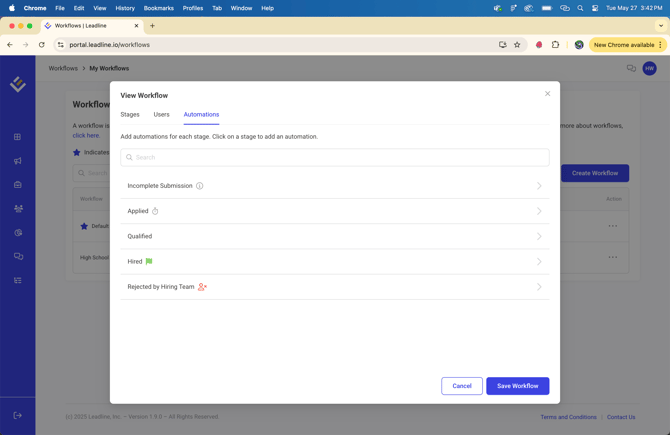
Choose a stage within the workflow to apply an automation. Automations at each stage will be triggered automatically when candidates are transitioned to or positioned in that stage, enhancing productivity.
After selecting a stage, utilize the dropdown menu to implement an automation. To schedule meetings, choose either the 'Send Email Message to Candidate' or 'Trigger Message Flow' option.
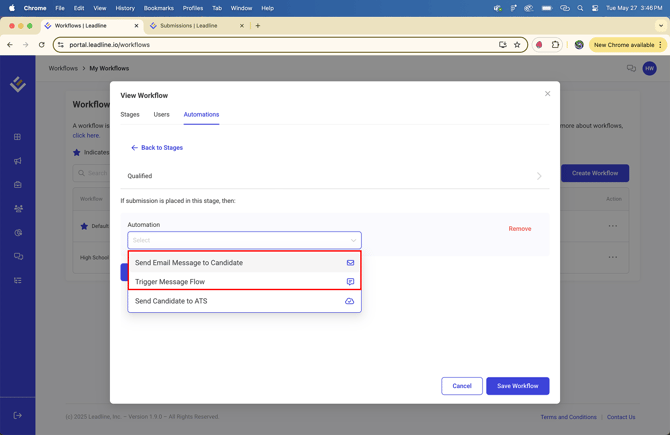
If preferred, you can add two automations to schedule meetings with candidates; one via email and one via text (all will be linked to the same unique link so there is no confusion).
Note: To send meeting links to candidates through an automation within a workflow (for both SMS and Email), it is required to have templates that include meeting links. We offer default templates that are ready for use. If you wish to create custom templates, please visit our message templates page.
(page coming soon).
Once you have selected the desired automation, it is required to designate a meeting host prior to saving the automation. The calendar of the meeting host will be visible to candidates.

'Additional Participants' are users within the system who will also be invited to the meeting, however the available times shown to candidates may not align with all participants' schedules. We are actively developing a solution to ensure that the times offered to candidates will soon be compatible for all attendees.
Once all necessary settings are configured, ensure you save the automation and the workflow. An icon will appear in the "automations" tab, indicating that the automation has been successfully saved to the stage.
Scheduling a Meeting Manually (CRM and Positions Page)
You can also send meeting invites to candidates manually using the bulk actions menu. (Whether you are looking at candidates in the 'Candidates' page or within a position) first, select the candidates you want to send a meeting invite to and click the 'Send Message' button.
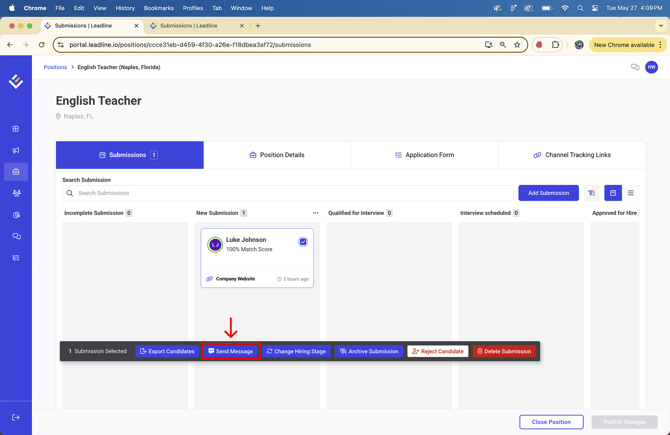
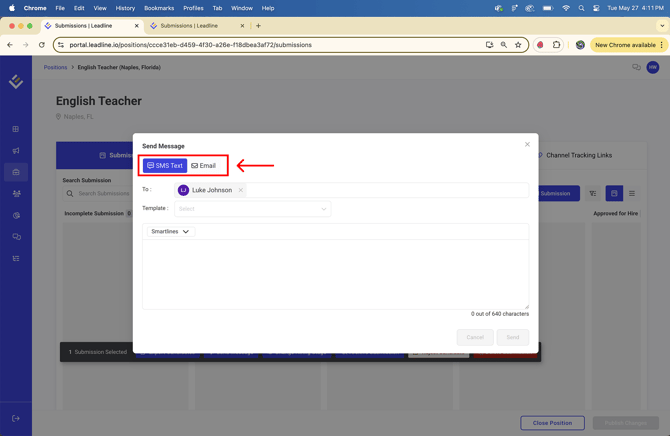
Note: You can use the segments component to switch between sending an SMS Text and Email
As previously mentioned, a template with a meeting link is necessary in your SMS/Email templates to send meeting links to candidates. You will be required to select a meeting host and set up additional participants as well.
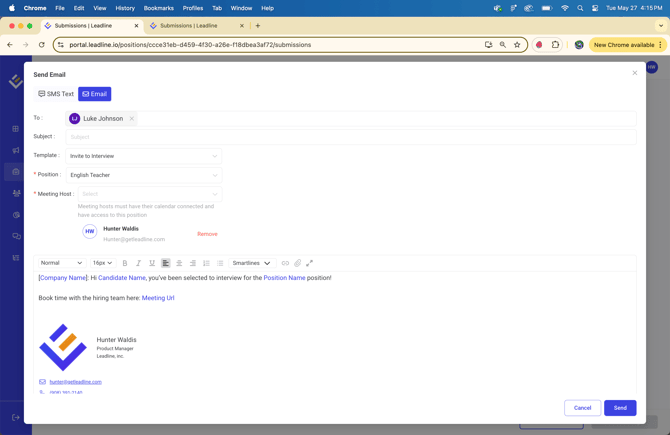
Once you have configured all settings, click 'Send' and the message with the attached meeting link will be sent to the selected candidates.
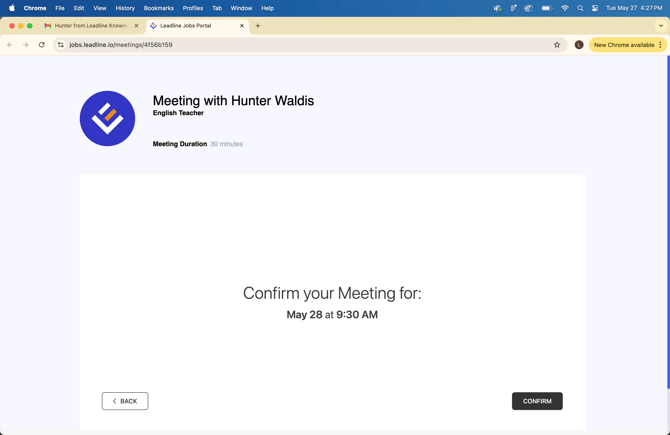
What does the candidate experience look like?
Whether the candidate clicks on a link via text message or email, the candidate will be immediately presented with the meeting hosts calendar.
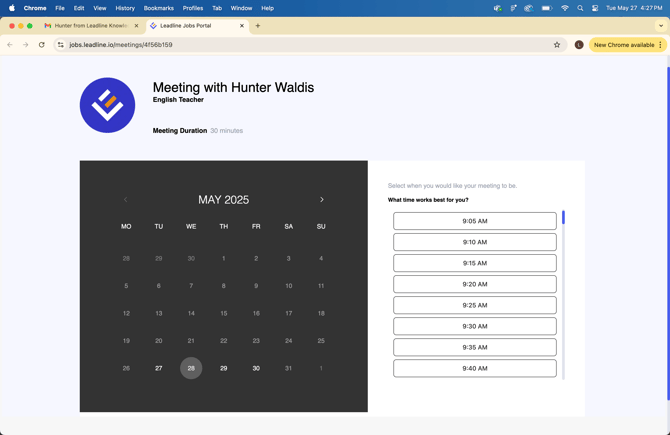
The candidate selects the date and time that works best, and confirms the meeting invitation. This action will trigger the system to create a new meeting on the designated recruiters or hiring managers calendar(s) (Calendars.ReadWrite permission):
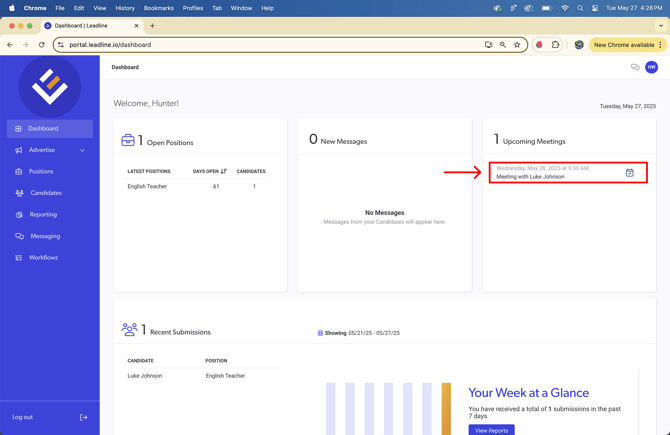
As meetings are booked with recruiters, Leadline will display the list of upcoming meetings on the recruiter’s dashboard (offline_access permission) so he/she knows what meetings with candidates they have upcoming.